The touch-sensitive buttons on the front of our Samsung dryer stopped working a few months ago. We rarely if ever use them, so it would not be a problem, except the dryer convinced itself that the child lock was also on. The child lock can only be removed by holding down two of the touch-sensitive buttons. Without those buttons, we could not turn off the child lock.
I ended up fixing it by replacing the circuit board with the buttons on it. It cost me about AUD70, and once I had the part, it took me about 20 minutes to do.
The problem
It took me a while to determine that the reason I could not turn the child lock off was the touch sensitive buttons themselves were not working. I searched the internet on how to disable the child lock, but almost all the comments (un)helpfully suggested holding down the two (touch sensitive) buttons which did not help me. I eventually found one comment that said that the front buttons are unreliable in moist environments. I am not sure if that comment was true (and I cannot find it now) but it did lead me to the solution.
I was able to confirm that the buttons themselves did not work. When child lock is active, and you press any button, the child lock indicator flashes slowly for a few seconds. When I pressed the touch sensitive buttons, the child lock indicator did not flash because it did not detect the button press.
The solution
It turns out the touch sensitive buttons on my dryer are controlled by an external printed circuit board “WW5000J REV6.2”. I opened my dryer, replaced the board, and now my dryer works fine again.
Where to buy the Board
I will start by saying that while the above board was the right one for me, please have a look inside your machine to confirm it is what you need before you order any replacement parts. It does not take that long, and you will feel like a fool if you buy the board, but it is the wrong one.
It appears there are many places that sell WW5000J REV6.2 boards. I went with Ali express, and it took about a week for it to get to me. It also appears to be available through eBay, and Amazon. I expect it is also available through more official channels. I will also note that it appears that there appear to be several different sellers on each of those sites. Shop around. You might find an alternate seller who is selling the board for substantially less.
How to open the dryer
It is not that hard to access the front board. I generally followed a YouTube guide to get in, but as the video was geared towards people opening the dryer up all the way to clean it, I have set out the steps I followed, below.
It should be obvious, but do this at your own risk, and of course, unplug the dryer first.
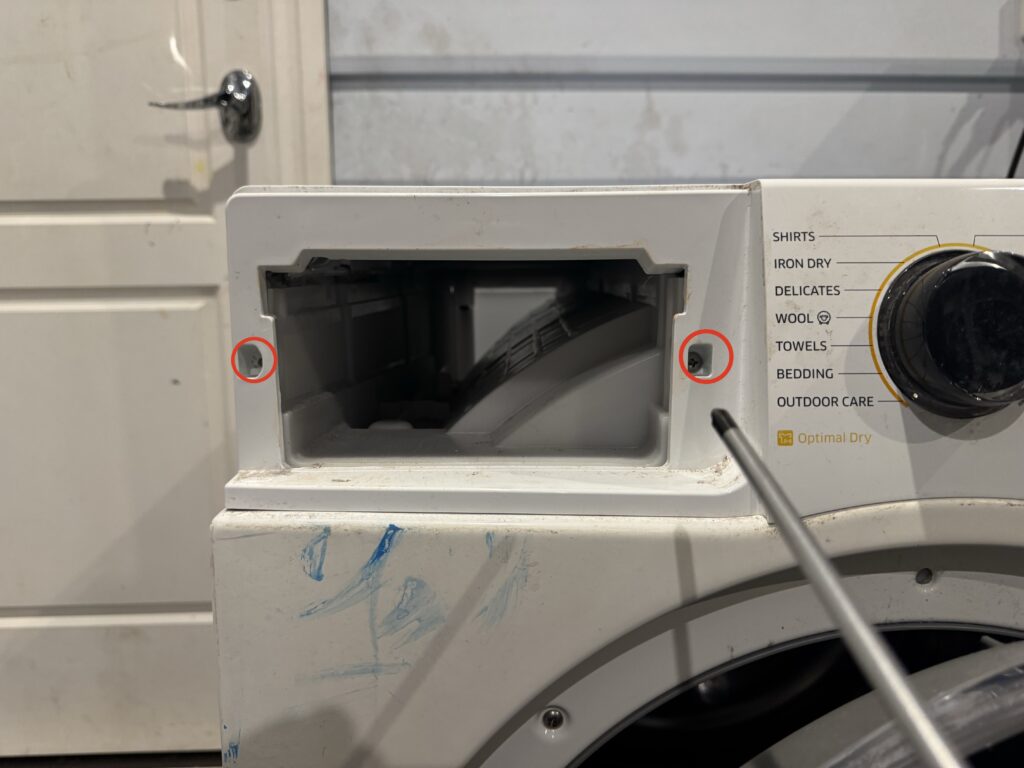
Remove the water receptacle, and remove the two screws it reveals.
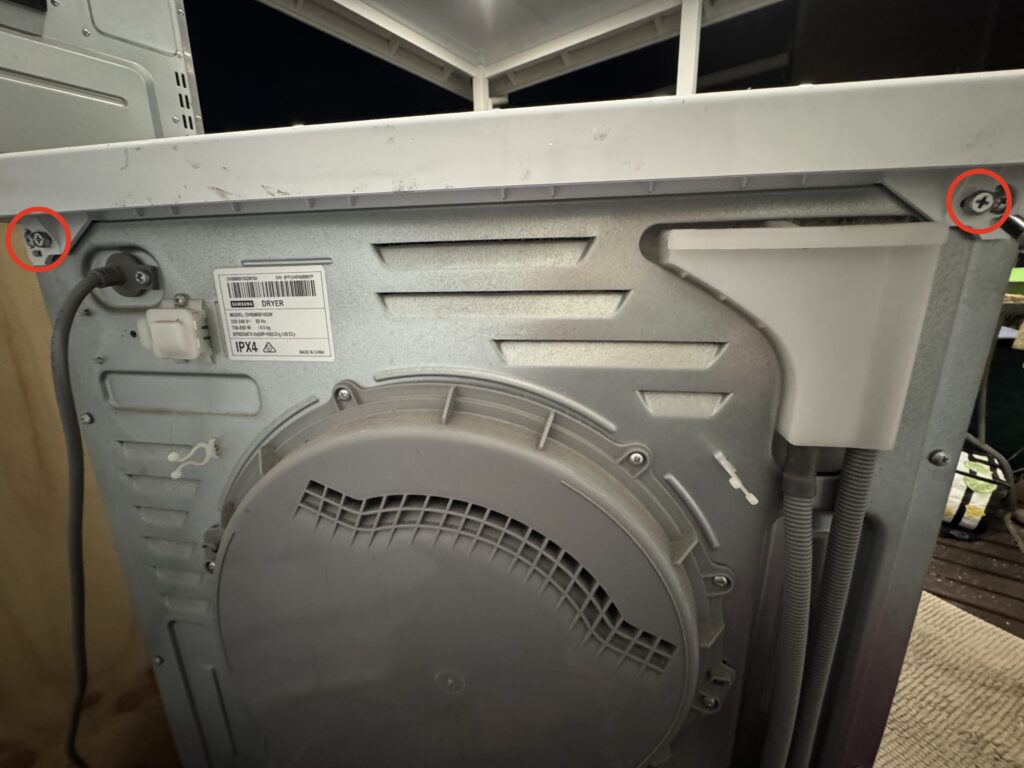
At the back of the dryer, there are two screws the hold the back of the dryer on. Note that on each side there are two screws. One goes through plastic and holds the back of the dryer on, the other goes directly into the metal. You only need to remove the one that goes through plastic.
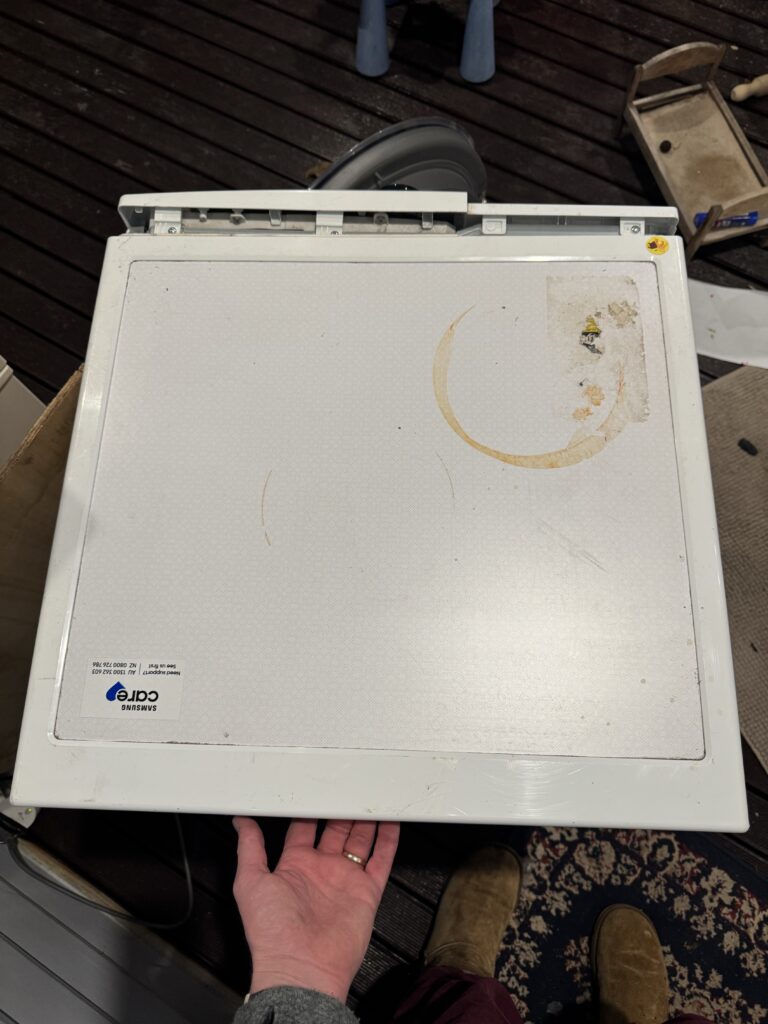
Once you remove those, you should be able to slide the top of the dyer back, and remove it. It should not require much pressure.
There are a three screws along the top of the display / control area. There are also some tabs. Remove the screws and gently wiggle the tabs free. The front should be free, but connected with many cables.
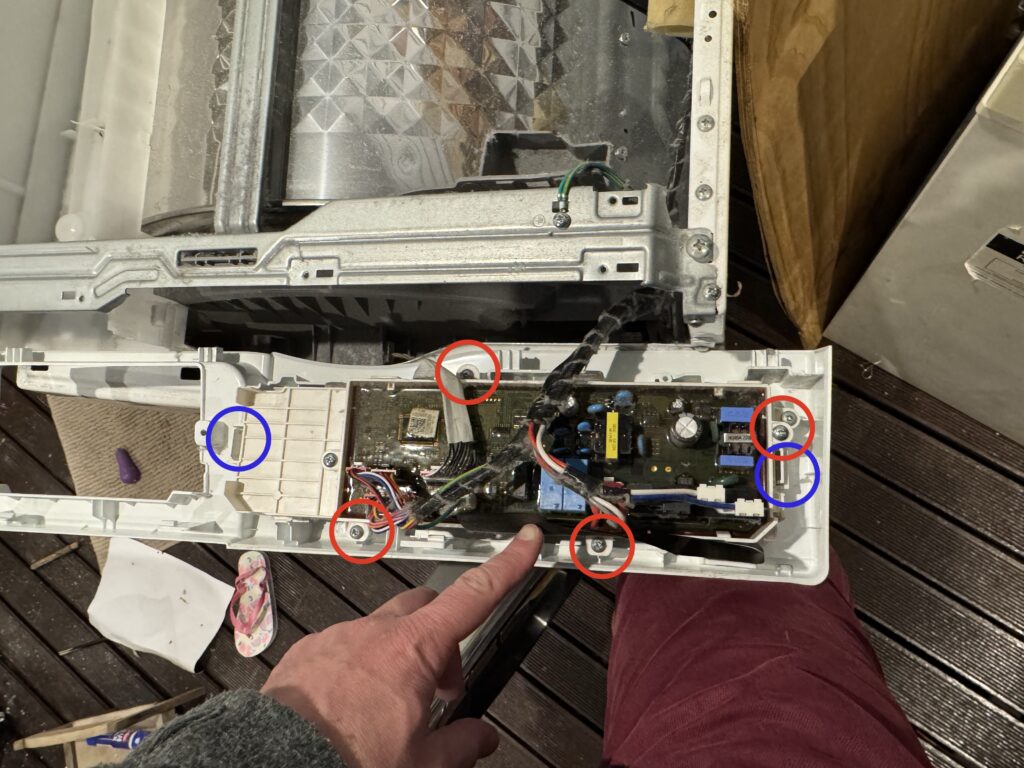
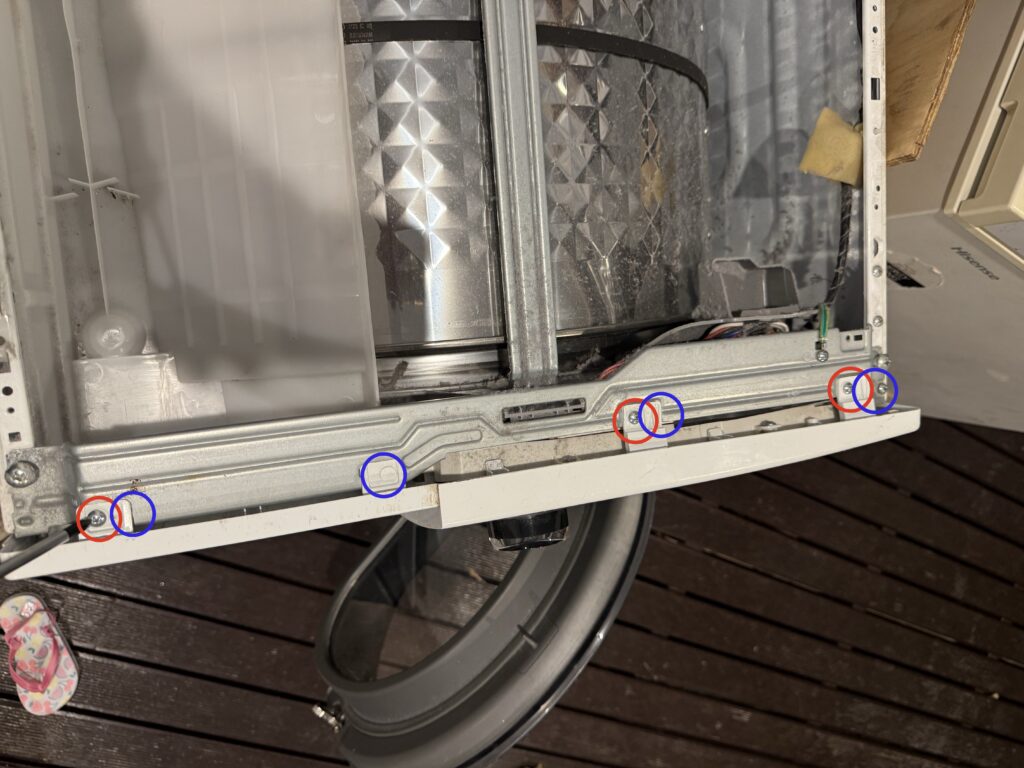
Do not put stress on the cables, but I had no replacing the front board without disconnecting these cables. There are several layers to the front of the dryer, but you need to just access the very front. For that, remove the four screws holding these boards to the front. There are also some screws that are holding these boards together, you will not need to remove those. There are also some tabs (more than are depicted in the above photo). Press them so the front can fall off.
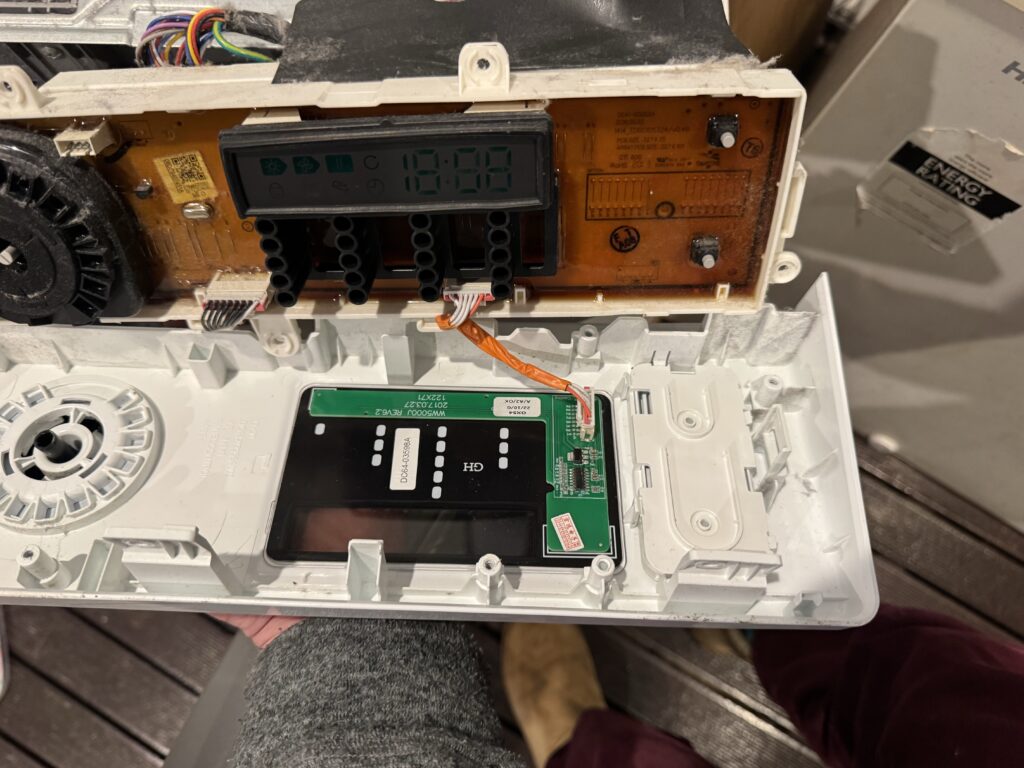
This is what it should look like when it is all off, and the board is ready to be replaced. You will need to disconnect this cable to be able to replace the board.
How to replace the board
Once you have the front panel separated, you can access the old board and replace it with the new one. At this point, I did test to check the old board did not work, and the new one did. Here is a video of my dryer first disabling child lock:
Of course, connecting the dryer to power while it is open has risks. I was able to arrange it such that the only part of the dryer I touched while it was connected to power were the 3M 2 sided tape patches.
Here is the old board, with the new, board from Ali Express:
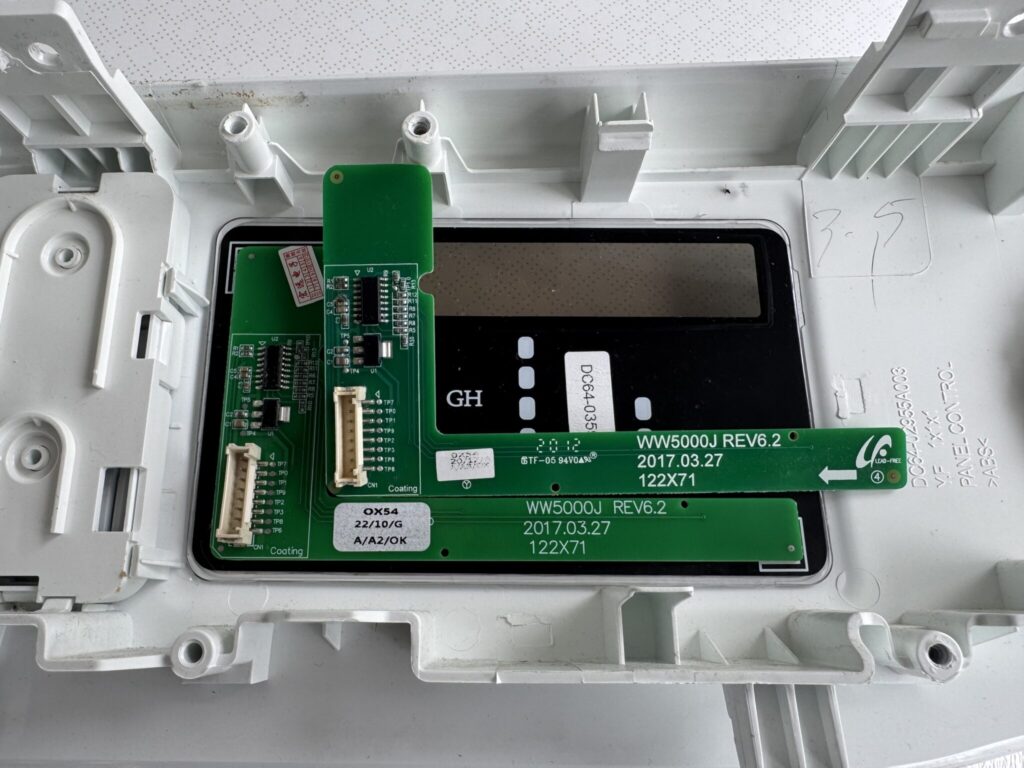
The old board will be stuck to the front panel with 3M 2 sided tape. I used a flathead screwdriver to gently pry the board away from the front panel, working my way around. Once the old panel is removed, clean up any residue on the front panel. Your new board should come with 2 sided 3M tape. Remove the protective cover from the tape, carefully align the board to match the old board, and press into place.
Connecting the cable to the new board can be a bit finicky, but is not too hard.
Reassembly
Follow the reverse steps above to reassemble the dryer. The only “tricky” thing is the dial on the front needs to be centred properly. It seems to be fairly forgiving, and I did not have any difficulty with this.